A hot-air brush is easiest to use when you approach it as a styling tool, not a faster version of a conventional dryer. Preparation and sectioning do most of the work.
For a shorter cut, use our dedicated hot-air brush guide for short hair.
Check the model's starting state, then move one section
Read the exact appliance instructions before the first pass: some airflow tools allow towel-dried hair, while a powered heated brush such as ghd Rise is dry-use only. For the UK BaByliss Air Style 1000 2136U, use the attachment and preparation directions in that manual. Do not transfer its directions to a different model simply because the head looks similar.
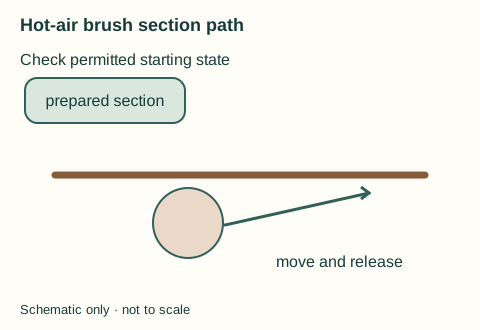
Table: swipe sideways on a small screen, or focus and use arrow keys.
| Stage | Action | Stop and rethink when |
|---|---|---|
| Prepare | Detangle and divide the hair at the model's permitted starting state. | Hair or attachment state conflicts with instructions. |
| Guide | Take one manageable section and move the head along it. | Neighbouring hair enters the brush. |
| Release | Let the section exit without repeated wrapping. | The head catches; switch off and release per manual. |
The short-hair owner maps face and nape zones; the long-hair owner maps clipped layers. Use this page for the common sequence rather than repeating one generic method for every length.
1. Establish the permitted starting state
Read the exact appliance directions first. If it permits damp-to-dry use, blot excess water and use the towel-dried, manageable state it describes. If it is a dry-use heated brush, dry by a separate permitted route before this styling stage. Never transfer one model's moisture permission to another.
2. Choose a sensible setting
Start at a setting permitted by your model and comfortable to direct. If a section is not progressing, first check its size and starting state; then adjust one control using the appliance's own labels. Do not carry a setting number or a fine-hair temperature rule over from another model. Use a cool option only if your appliance provides one and its directions allow it.
3. Work in sections
Clip away most of your hair and begin underneath. Take a section that is no wider than the brush can comfortably control. Start near the roots, then guide the brush through the lengths with steady movement. Do not hold one area under hot air for too long.
4. Shape deliberately
For a smoother finish, direct the brush down through the lengths. For more root lift, raise the section slightly at the roots before moving along it. Use smaller sections around the face and on shorter layers.
5. Finish and clean the tool
Let the tool cool before removing hair from the brush or storing it. Clear loose hair from the barrel after use and follow the manufacturer cleaning guidance.
Keep the section under control
Use light, steady tension rather than wrapping a large section tightly around the barrel. If a section catches, stop and release it gently rather than continuing to turn the brush. The next pass should use less hair, a smoother starting section or a different angle. This is usually more effective than increasing heat or airflow immediately.
When changing technique, use this order: stop if the head catches; switch off or release it as directed; reduce the amount of hair; then check that the section is in the permitted state and the attachment is fitted as the manual requires. Repeating a snagging pass at a higher setting does not address the cause.
Work upward through the head and keep finished sections separate from damp hair. A cool setting can help finish the shape if your model has one. When it does not, pause briefly before brushing through the result. That gives you a chance to see whether the direction and barrel size suit the finish you want.
Common mistakes to avoid
Starting with soaking-wet hair, taking oversized sections and using maximum settings from the first pass can make the routine feel slow. Start with towel-dried hair as instructed, work from lower layers upward and change one variable at a time. If drying feels slow, a short pre-dry may be more useful than trying to force more hair onto the barrel.
Who this guide is for
This method is for someone who wants a brush-led dry with smoothing, lift or a soft end bend and is prepared to section hair. Choose a conventional dryer if fast moisture removal, a diffuser or broader routine flexibility is the priority. Use the broad hot-air brush buying guide if you have not chosen a tool yet.
Read Best Hot-Air Brushes to choose a suitable model, and Hot-Air Brush vs Hair Dryer if you are still deciding which tool type makes sense.
If the finish looks frizzy immediately
Pause before making another pass. Check whether the section is small enough to rest evenly on the barrel and whether it is at the starting moisture level allowed by your model. A damp-to-dry airflow brush and a dry-hair heated brush need different preparation; follow the label on your own device. For a focused next step, see the hot-air-brush frizz checklist.
Make the final adjustment
Follow your model's starting-state instructions, use sections you can guide without pulling, and change one control at a time when the result needs adjustment. Stop before repeating a pass that does not improve the section.