A hot-air brush can make long hair feel easier to style because it dries and shapes a section in the same movement. The most reliable approach is to begin with hair that is damp rather than dripping, split it into layers and work from the lower lengths upward. Long hair does not need large sections: a section that the barrel can hold and release calmly is more useful than one that looks efficient but stays damp underneath.
Think of the tool as a way to guide the hair into a finish, not a reason to pull every length tight. Small adjustments to section size, barrel direction and starting dampness are usually more effective than repeatedly using the highest setting.
Keep the length in an open working lane
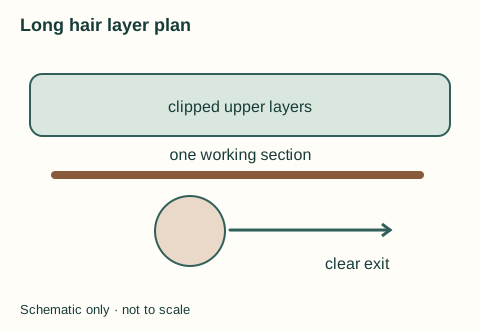
Clip the upper hair away from the head before placing a lower section. Choose a section that fits across the usable brush surface; its length can travel beyond the head without winding repeatedly around it. Guide the head toward the ends and leave a clear route for release before unclipping the next layer. If the ends catch, stop and follow the model's release directions rather than adding another rotation. This is the main difference from short-hair work, where reaching the nape and face frame sets the head choice.
The UK BaByliss Air Style 1000 2136U booklet documents a 50 mm round attachment and a paddle head. That provides different section paths, but it does not prove the round head fits every short layer inside long hair. Try the shortest face piece separately and compare its reach to the larger lower section.
| Problem | Change the working lane |
|---|---|
| Upper layers fall into the head | Clip them farther from the active lower section. |
| Length wraps more than intended | Unwind and guide the section along the surface. |
| Face frame will not follow the broad head | Use a smaller permitted head or separate dryer path. |
Choose a barrel that suits the result
| Finish you want | Useful starting point | What to watch for |
|---|---|---|
| Smooth, loose lengths | Medium or large barrel | A very large barrel can be difficult near shorter layers |
| Soft bend through the ends | Medium barrel | Use only a small turn at the end of the pass |
| Lift around the crown | A barrel you can place close to the roots | Take smaller top sections for control |
A larger barrel can make long lengths look smooth and broad, but it is not automatically the best choice. It still needs to feel secure in your hand and release the section easily. If you are comparing attachments or features, start with our hot-air brush buying guide before deciding which format matches your routine.
Step 1: prepare and divide the hair
Begin with towel-dried hair that is detangled enough for a brush to travel through without catching. If your hair holds a lot of water, a short pre-dry can make the shaping stage calmer. Follow the instructions for your specific appliance, particularly if it has guidance about how damp hair should be.
Divide the hair into a lower layer, a middle layer and a top layer. Clip the layers above your starting point out of the way. Within each layer, take a section no wider than the barrel and thin enough for air to reach through it. Long hair often looks dry on the surface before the inside of a wide section is ready, so this step saves time later.
Step 2: start underneath and guide from root to end
Place the brush near the root of the first lower section and lift it slightly away from the head. Give the root a brief, controlled pass, then move steadily down the length. Keep light tension: enough to guide the hair, not enough to make the tool feel stuck.
For a smoother result, keep the barrel moving in a straightforward root-to-end path. For a subtle inward or outward finish, make a small turn only as you reach the ends. Avoid winding the whole length around the barrel. It is harder to release and can leave you with a shape you did not intend.
Step 3: style the crown and front separately
Once the lower layers are dry, release the middle and top layers one at a time. Around the crown, use narrower sections and lift them a little more at the root before guiding the lengths through. This gives the top layer direction without making the rest of the hair look overworked.
Leave face-framing pieces until last. They are the sections most likely to need a different direction from the rest: a gentle turn away from the face can create an open finish, while a smooth downward pass keeps the result quieter. Let each section cool briefly before brushing through it with your fingers.
Common long-hair problems
| What happens | Likely reason | Try next time |
|---|---|---|
| The ends stay damp | The section is too wide or starts too wet | Pre-dry a little more or reduce the section size |
| The brush catches | Too much length has been wrapped around the barrel | Keep the pass straighter and unwind gently |
| The crown is flat | Top sections were dried in their natural direction | Lift the root slightly before moving through the length |
| The finish is uneven | The top surface was styled before lower layers were dry | Finish one layer before releasing the next |
When a dryer and round brush may suit you better
A hot-air brush is convenient for a one-tool, brush-led routine. A separate dryer and round brush can be the better fit when you want to change the airflow angle independently, use several barrel sizes or remove moisture quickly before shaping. Neither is a universal upgrade; choose the routine you can control comfortably. Our hot-air brush versus hair dryer and round brush guide explains the practical differences.
Keep the tool working well by removing loose hair after use and clearing the intake only once it is unplugged and cool. See how to clean a hot-air brush for a safe routine, or return to the Hot-Air Brushes hub for related guides.