Blow-drying long hair with a round brush is easiest when you separate drying from shaping. First remove excess moisture, then use the brush on manageable sections with airflow traveling from root to end. This method gives you a smoother finish and more control over the ends than trying to dry a large, wet mass of hair at once.
The goal is not a perfectly complicated salon technique. A clean brush, a dryer you can hold comfortably and a repeatable sectioning plan will do more for the result than rushing through with oversized sections.
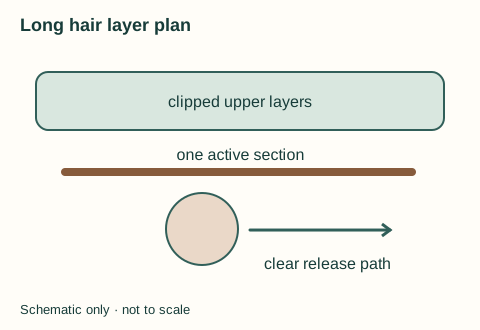
Long lengths can wrap around a barrel more than intended. Keep a clear place for clips and free hand movement; separate the next layer only after the current one releases. If ends keep winding back into the brush, use less hair per pass or a broader curve for the intended loose finish. If face-framing layers cannot follow that broader curve, keep a smaller brush for those pieces or skip the round-brush bend there. The largest listed barrel is not automatically the best single choice for all long hair.
Set up with a practical brush and dryer
For long hair, a medium or large round brush is often a useful starting point. A medium barrel gives more control around layers and ends; a larger one can create a looser, broader finish. Choose the largest barrel that still lets you place the brush near the root and unwind a section without a struggle.
A concentrator nozzle can make the airflow easier to direct along the hair, but the most important habit is the direction itself: let the dryer follow the brush from root to end rather than blowing across the section. If you are unsure which barrel matches your length and desired shape, use our round brush size guide.
Step 1: rough-dry before you section
Gently towel-dry after washing, then remove extra moisture until the hair is damp rather than dripping. You can use the dryer without the round brush at this stage, keeping it moving and focusing on the densest areas near the roots and underneath. Starting the brush stage too early is a common reason long hair becomes tangly and takes longer than expected.
Detangle before you begin the round-brush work. A knot is easier to loosen before heat and tension are involved, and a clean brush will travel through a section more predictably. Our hairbrush cleaning guide covers the usual cleaning methods for different brush materials.
Step 2: work in layers from the nape upward
Clip the top two-thirds of the hair away and begin with a narrow lower layer at the nape. Take a section no wider than the brush barrel. If you cannot see or feel airflow reaching through the section, make it thinner rather than reaching for more heat.
Place the brush beneath the section near the root and lift it slightly away from the head. Aim the dryer down the length while the brush moves steadily toward the ends. Keep the brush leading the motion; the dryer simply follows the shape you are creating. Complete the lower layer before releasing the next one, so damp hair underneath does not disrupt the finished surface.
Step 3: choose a finish at the ends
| Desired result | Brush movement near the ends | Useful reminder |
|---|---|---|
| Mostly straight and smooth | Guide the hair over the barrel with little rotation | Keep the airflow moving down the section |
| Soft inward bend | Turn the brush slightly during the final part of the pass | Do not wrap the full length around the barrel |
| Open face-framing shape | Guide the front pieces slightly away from the face | Use smaller sections around shorter layers |
Let a finished section cool for a moment before pulling it straight or brushing it out. The shape does not need to be dramatic; a small, deliberate movement at the ends is usually enough to keep long lengths from looking unfinished.
Step 4: give the crown and front extra control
When you reach the top layer, use slightly smaller sections around the crown and parting. Lift the root a little before moving down the length, then keep the middle and ends smooth. This separates root direction from end shape, so you do not have to over-roll the whole section just to avoid a flat top.
Leave the face-framing pieces until last. Direct them away from the face for a more open result, or keep the movement mostly downward for a quieter finish. If you want more lift at the roots, our round-brush root-volume guide gives a focused technique.
Fix the problems that slow long-hair blow-dries
| Problem | Common cause | Better approach |
|---|---|---|
| The brush tangles | The section is too wide or has been rolled too far | Use a thinner section and unwind rather than pulling |
| The underneath stays damp | The lower layer was skipped or sections are too thick | Start at the nape and complete each layer in turn |
| Roots look flat | The brush starts halfway down the section | Begin close to the root and lift slightly first |
| Ends look over-curled | Too much barrel rotation | Use a smaller final turn on the next pass |
A simpler alternative when one tool feels easier
A separate dryer and round brush gives you flexible airflow and brush choices, but it is not the only useful way to style long hair. A hot-air brush combines those jobs in one hand-held tool and may feel more straightforward for a soft, brush-led finish. Compare the two routines in our hot-air brush versus hair dryer and round brush guide, or browse all related articles in the Brushes and Combs hub.