Start with the instructions for your exact set. For a continuous ribbon-style rod, position the middle over the crown, wrap each side in sections toward the ends, secure as its maker directs, let the set reach the stated readiness condition, then loosen the fasteners and unwind carefully. The sequence below uses the documented Kitsch Sunset Tie Dye Satin Heatless Curling Set as one example, not a rule for every rod.
Know which tool you have
A continuous rod or ribbon spans the head and gives each side a long wrapping path. Kitsch lists a 34-inch-long, 1.25-inch-diameter rod and two scrunchies for this exact set; the temporary positioning claw clip shown in its directions is not included. Individual flexi rods work differently: each short rod rolls its own section from the ends toward the head and bends closed. Do not use the continuous-ribbon sequence for a foam roller or assume another maker supplies the same fasteners.
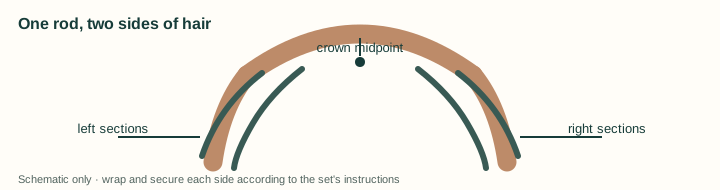
- Crown: the midpoint of one continuous rod sits across the top.
- Left and right: each half of the hair follows its own side of the rod.
- Top section → add the next section → continue toward the ends; keep loose layers visible.
- End of each side: secure with the fastener provided or permitted for the exact set.
If a layer cannot reach the rod or an end cannot stay inside the fastening, the chosen format may not fit that section. See the short-hair method for a local section approach.
Set up one side before repeating it
- Read the product directions. Check the maker's permitted starting condition, included accessories, positioning and release method. Kitsch says damp or dry hair for the named continuous set. That does not prescribe a dryness percentage for other products.
- Separate the two sides. Make a part that lets you manage one side without accidentally picking up hair from the other. Smooth only enough to see the ends and layers.
- Position the rod. Place its midpoint across the top as the Kitsch directions show and use a temporary clip if the instructions permit. Test whether each side leaves enough rod for the last sections and fastening.
- Build the wrap. Begin with an upper section, wind it around the rod, then incorporate the next section as you work downward. Watch the path of the ends instead of tightening the entire side to compensate for an escaping layer.
- Secure and mirror. Fasten the finished side with the supplied scrunchie for the named set. Repeat the process on the opposite side. Check that neither fastener depends on pulling the rod tightly against the head.
- Wait and release. Kitsch says to let hair dry or wear the set overnight. The amount of time depends on the starting condition and product directions; there is no universal overnight requirement. Remove the fasteners, loosen the wrap and draw out the rod as the named instructions describe. Do not yank through a caught section.
Table: swipe sideways on a small screen, or focus and use arrow keys.
| Stage | What to check | Common difficulty | Next adjustment |
|---|---|---|---|
| Position | Is the rod centered with usable length on both sides? | One side runs out of rod. | Reposition before wrapping; inspect the set's stated dimensions and fit. |
| First wrap | Can you see the first section's ends? | Layer drops away. | Use a smaller manageable section where the instructions allow. |
| Last wrap | Does the fastener close over the last section? | Ends escape. | Redo that local section or choose an individual roller for it. |
| Release | Is the section ready by the maker's directions? | Shape does not form or catches. | Record whether the problem arose before removal or during unwinding. |
Check fit and release
Before securing the first side, compare the exposed rod length and loose sections on the other side. If the last layer will not reach its fastener, undo only that local wrap and use a smaller section where the product directions allow. Pulling the whole ribbon tighter is unlikely to solve a fit mismatch. Daytime wear is an option when a fastener is uncomfortable in bed; comfort varies by person and design.
Release one side at a time. Notice whether an end escaped before removal, the wrap caught while unwinding or the shape was absent immediately. Those observations point to different adjustments, covered in heatless-curl troubleshooting. For a format choice before styling, use the set selection guide. Follow the exact maker's release path if it differs from this Kitsch example.
Source
Kitsch's exact continuous-set product page and use directions support the named example, dimensions and supplied parts. The section map and checks are editorial aids, not manufacturer measurements or observed test results.