The easiest way to use a round brush with a hair dryer is to rough-dry first, then work in small sections with airflow moving from root to end. Use the brush to create tension and shape; use the dryer to dry that shape into the section. If you try to use a round brush on very wet, unsectioned hair, it usually becomes slow and tangly.
You do not need salon-level coordination. Start with a brush size that suits your hair length, use fewer sections than you think you need, and aim for a controlled, repeatable motion rather than an elaborate technique.
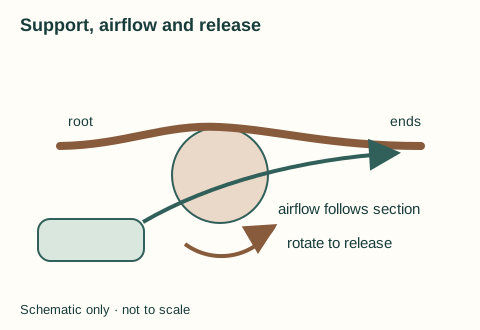
Choose one section no wider than the usable brush surface. Keep the dryer nozzle moving along the section rather than directing it toward the scalp or holding it against bristles. If the hair begins to wind around the handle or catches the barrel, stop and reverse the wrap gently; the caught-brush guide handles that situation in detail. Practising the release on one visible front section is more useful than completing the whole head before noticing a snag.
What you need
- A hair dryer with a concentrator nozzle if you have one
- A round brush suited to your hair length
- Sectioning clips or a loose hair tie
- A mirror and enough room to move the dryer behind the brush
The nozzle is useful because it directs air along the hair instead of scattering it everywhere. It is not essential, but it makes the process easier to control.
If you are unsure about barrel size, use our round brush size guide. A brush that is too small can wrap long hair too tightly; one that is too large can slide through short layers without creating any lift.
Step 1: begin with partly dried hair
Gently towel-dry after washing. If hair is still dripping, remove more moisture first by letting it air-dry for a while or using the dryer without the round brush. The exact starting point depends on hair density and the dryer, but the brush stage is normally more manageable when hair is damp rather than saturated.
Before using heat, follow the instructions for any styling product you choose. Keep the goal modest: a round brush is most effective when it is shaping a section that is already reasonably manageable, not trying to solve every tangle and dry the entire head at once.
Step 2: split the hair into workable sections
Divide the hair into a lower section and an upper section, then clip the upper part out of the way. On thick hair, make more sections. The right section should be no wider than the brush barrel and thin enough that warm air can travel through it.
Large sections are the most common reason a home blow-dry feels ineffective. Hair may look dry on the surface while remaining damp underneath, and the brush cannot hold enough tension to create a consistent shape.
Step 3: place the brush at the root
Start with the brush beneath the section, close to the root but without scraping the scalp. Lift the section slightly away from the head. This is where the brush creates direction and potential lift.
Point the dryer down the section, following the brush. Keep the air moving instead of holding it in one place. Move the brush slowly from root to end, keeping enough tension for control without yanking the hair.
For a smoother finish, keep the section pulled gently outward as you move down. For more root lift, raise the section more vertically at the beginning, then continue through the lengths.
Step 4: shape the ends deliberately
When you reach the ends, decide what you want them to do. For a soft inward shape, roll the final part of the section around the brush and hold briefly while continuing the airflow. For an outward flick, direct the brush the other way. For a mostly straight result, do not over-roll: simply guide the ends smoothly over the barrel.
Let the section cool for a moment before releasing it. You do not need to wait a long time, but immediately pulling it straight while it is still warm can undo the shape you have just created.
Step 5: repeat, then finish the top sections
Continue across the lower section before releasing the upper section. Around the face and crown, use slightly smaller sections so you can direct them precisely. If you want a little lift at the front, place the brush at the root, lift the hair away from the head and dry that root area before working down the length.
When everything is dry, use your fingers to separate the sections rather than immediately brushing them flat. This keeps the result softer and lets you see where extra smoothing is actually needed.
The airflow and brush rule that makes the biggest difference
The brush leads; the dryer follows. If the dryer is pointing randomly at the side of the hair, the section becomes harder to control. Keep airflow traveling in the same direction as the hair from root to end, with the nozzle roughly following the brush.
This is also why a separate dryer and round brush can feel more flexible than a hot-air brush: you can control the angle of each tool independently. If convenience matters more than that flexibility, see our guide to hot-air brush versus hair dryer and round brush.
Common mistakes and simple fixes
| Problem | Likely cause | Try this instead |
|---|---|---|
| Hair tangles around the brush | Barrel too small or section too wide | Use a larger barrel or smaller section; unwind gently |
| Roots look flat | Brush never gets close to the root | Begin at the root and lift the section before moving down |
| Ends look uneven | The section was rushed at the end | Slow down for the final few centimetres and choose a deliberate direction |
| Hair feels unfinished | The inside of a large section stayed damp | Use thinner sections and check underneath before moving on |
A low-stress routine to practise
For the first few attempts, do not try to blow-dry every section perfectly. Practise on the face-framing pieces and the top layer, where a little shape is most visible. Once the brush-and-dryer movement feels natural, expand to the whole head. This is far more productive than battling through every length at once.
Keep your brushes clean too. Lint and product residue make a round brush less grippy and harder to roll smoothly. Our hairbrush cleaning guide explains safe cleaning for plastic, wood, natural-bristle and electrical tools.
Plan how the brush will come out
Before rolling, keep the working section narrower than the barrel and clip neighbouring hair aside. Roll only as far as you can reverse comfortably; release along the same route instead of pulling straight through a coil. If it catches, stop the dryer and unwind the most recent turn gently. For a focused next step, see the caught round-brush guide.